Create model lineage map
3 minute read
This page describes creating lineage graphs in the legacy W&B Model Registry. To learn about lineage graphs in W&B Registry, refer to Create and view lineage maps.
A useful feature of logging model artifacts to W&B are lineage graphs. Lineage graphs show artifacts logged by a run as well as artifacts used by specific run.
This means that, when you log a model artifact, you at a minimum have access to view the W&B run that used or produced the model artifact. If you track a dependency, you also see the inputs used by the model artifact.
For example, the proceeding image shows artifacts created and used throughout an ML experiment:
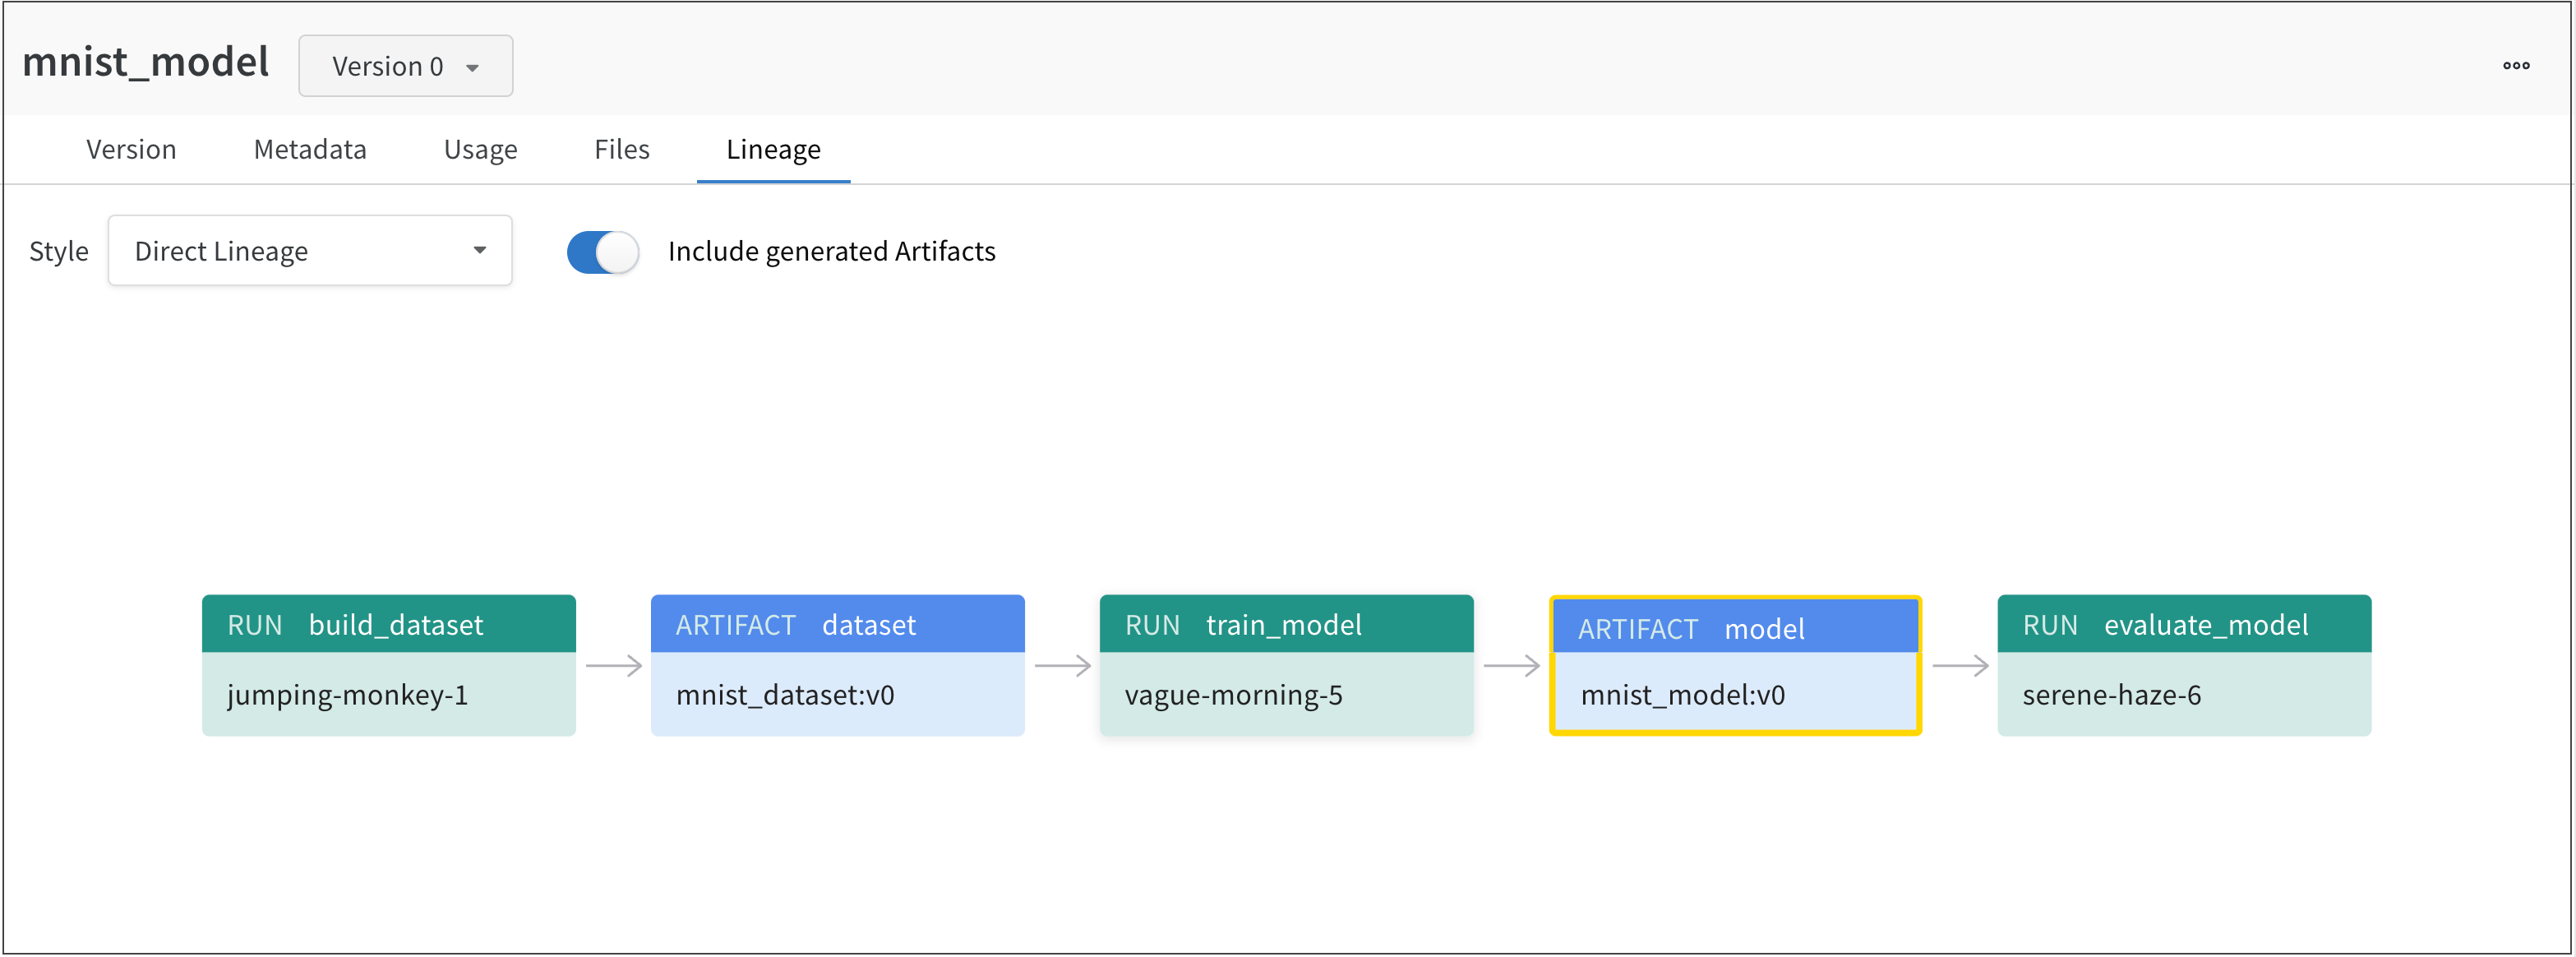
From left to right, the image shows:
- The
jumping-monkey-1W&B run created themnist_dataset:v0dataset artifact. - The
vague-morning-5W&B run trained a model using themnist_dataset:v0dataset artifact. The output of this W&B run was a model artifact calledmnist_model:v0. - A run called
serene-haze-6used the model artifact (mnist_model:v0) to evaluate the model.
Track an artifact dependency
Declare an dataset artifact as an input to a W&B run with the use_artifact API to track a dependency.
The proceeding code snippet shows how to use the use_artifact API:
# Initialize a run
run = wandb.init(project=project, entity=entity)

# Get artifact, mark it as a dependency
artifact = run.use_artifact(artifact_or_name="name", aliases="<alias>")
Once you have retrieved your artifact, you can use that artifact to (for example), evaluate the performance of a model.
Example: Train a model and track a dataset as the input of a model
job_type = "train_model"

config = {
    "optimizer": "adam",
    "batch_size": 128,
    "epochs": 5,
    "validation_split": 0.1,
}

run = wandb.init(project=project, job_type=job_type, config=config)

version = "latest"
name = "{}:{}".format("{}_dataset".format(model_use_case_id), version)

artifact = run.use_artifact(name)

train_table = artifact.get("train_table")
x_train = train_table.get_column("x_train", convert_to="numpy")
y_train = train_table.get_column("y_train", convert_to="numpy")

# Store values from our config dictionary into variables for easy accessing
num_classes = 10
input_shape = (28, 28, 1)
loss = "categorical_crossentropy"
optimizer = run.config["optimizer"]
metrics = ["accuracy"]
batch_size = run.config["batch_size"]
epochs = run.config["epochs"]
validation_split = run.config["validation_split"]

# Create model architecture
model = keras.Sequential(
    [
        layers.Input(shape=input_shape),
        layers.Conv2D(32, kernel_size=(3, 3), activation="relu"),
        layers.MaxPooling2D(pool_size=(2, 2)),
        layers.Conv2D(64, kernel_size=(3, 3), activation="relu"),
        layers.MaxPooling2D(pool_size=(2, 2)),
        layers.Flatten(),
        layers.Dropout(0.5),
        layers.Dense(num_classes, activation="softmax"),
    ]
)
model.compile(loss=loss, optimizer=optimizer, metrics=metrics)

# Generate labels for training data
y_train = keras.utils.to_categorical(y_train, num_classes)

# Create training and test set
x_t, x_v, y_t, y_v = train_test_split(x_train, y_train, test_size=0.33)

# Train the model
model.fit(
    x=x_t,
    y=y_t,
    batch_size=batch_size,
    epochs=epochs,
    validation_data=(x_v, y_v),
    callbacks=[WandbCallback(log_weights=True, log_evaluation=True)],
)

# Save model locally
path = "model.h5"
model.save(path)

path = "./model.h5"
registered_model_name = "MNIST-dev"
name = "mnist_model"

run.link_model(path=path, registered_model_name=registered_model_name, name=name)
run.finish()
Feedback
Was this page helpful?
Glad to hear it! If you have more to say, please let us know.
Sorry to hear that. Please tell us how we can improve.